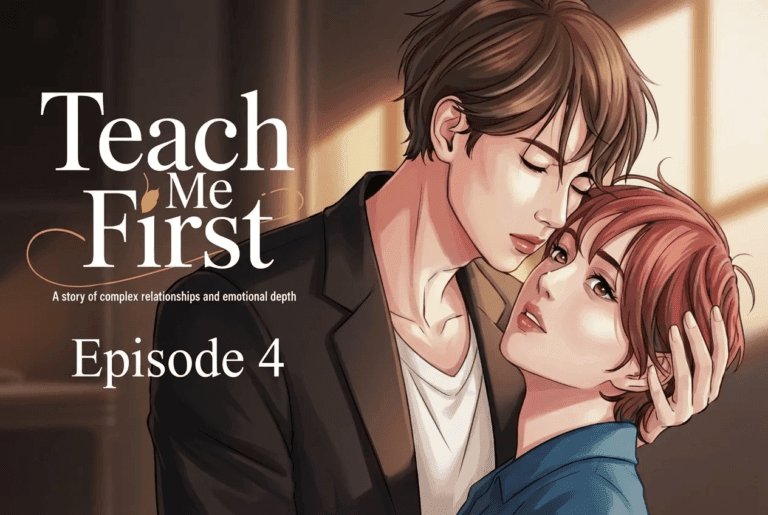
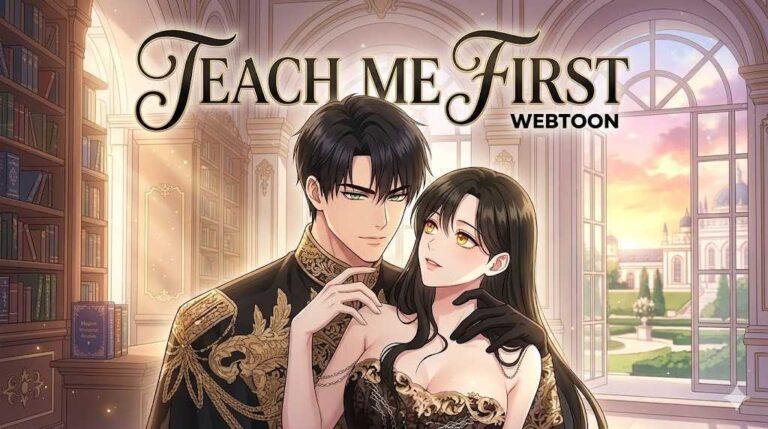
Teach Me First Comic: Honest Review 2026
Teach Me First Comic Broke Me. Here’s Why You Should Read It Anyway
Okay so. Let me just say this upfront — I didn’t expect to get hooked on Teach Me First Comic. Like, at all.
I was scrolling through Honeytoon late one night (don’t judge me) and saw the cover art. Looked kinda moody, kinda intense. I thought, “Fine, I’ll give it one episode.”
Three hours later I’d finished everything and was just sitting there in the dark like… what did I just read?
This isn’t your typical step-sibling romance trash. I swear. I’ve read those before and they’re usually cringey or way too dramatic. But this one? It’s awkward in the best way possible. Messy. Real.
Let me break down why you need this comic in your life — but also warn you about the emotional damage it might cause.
Teach me First Comic
| Category | Details |
|---|---|
| Full Title | Teach Me First |
| Platform | Honeytoon (honeytoon.com) |
| Genre(s) | Mature Romance, Psychological Drama, Forbidden Love |
| Tone | Sexually charged, emotionally ambiguous, slow-burn tension |
| Format | Webtoon (digital, scroll format, full color) |
| Target Audience | Adults (18+ due to mature themes) |
| Status | Complete / Standalone episode (not an ongoing long serialization) |
| Character | Role | Personality / Notes |
|---|---|---|
| Andy | Male Lead / Step‑brother | Torn, guilt‑ridden, trying to stay loyal to his fiancée while feeling a forbidden pull toward his step‑sister. Relatable but frustrating. |
| Mia | Female Lead / Step‑sister | Once a child he protected, now a young woman. Her plea to “teach her” is more about longing and emotional confusion than actual education. Vulnerable, not manipulative. |
| Amber | Andy’s Fiancée | Innocent bystander. Sweet and clueless, but her presence is the ticking time bomb that forces Andy to make impossible choices. |
| Element | Description |
|---|---|
| Premise | Andy returns to his family ranch for the summer, bringing his fiancée Amber. There he reunites with Mia, his step‑sister, who is no longer the little girl he remembers. Old memories stir, and an uncomfortable, forbidden attraction begins to grow. |
| Major Conflict | Andy tries to balance his commitment to Amber with the growing, undeniable pull toward Mia. Every glance, every silence, every accidental touch becomes loaded with tension. |
| Key Scenes / Symbols | The barn (where the charged reunion happens), a storm that traps them together, warm golden tones vs. deep shadows to highlight emotional turmoil. |
| Underlying Message | The comic explores the gray area of desire — no clear heroes or villains. It’s about hesitation, vulnerability, and the messy reality of wanting something you shouldn’t want. |
What Even Is This Comic About?
So basically, Teach Me First is a mature romance webtoon on Honeytoon. The main guy is Andy. He comes back to his family’s ranch for the summer. Normal, right?
Except he brings his fiancée, Amber.
And then he sees his step-sister Mia again.
But Mia isn’t a kid anymore. She’s grown up. And Andy? He goes completely sideways. Not in a gross, creepy way — more like a “oh no, I’m totally screwed” kind of way. The comic is basically watching a guy try really hard to be a good person while his brain keeps betraying him.
It’s forbidden love. It’s tension. It’s that moment when you know you shouldn’t want something but you want it anyway.
The Story (Without Ruining the Good Parts)
Look, the beginning is slow. Like slow slow. Andy and Amber pull up to the ranch all smiley and couple-y. Everything’s fine.
Then Andy starts looking around. You can tell he’s nervous. Why? Because he knows Mia is somewhere nearby.
When they finally meet? The art does all the work. There’s this barn scene early on — episode 3 I think — where they hug and it just lasts too long. Like, you’re reading it going “okay this is a normal sibling hug” but no. It’s not. The panels hold on their faces. The eye contact. The way Mia grabs his arm.
I remember actually whispering “oh no” out loud.
The whole summer is just this slow boil. Andy’s trying to be loyal to Amber. Mia keeps pushing boundaries — not in a mean way, but more like she’s confused and testing things. There’s this storm scene later where the power goes out and they’re stuck together. Nothing really happens, but somehow that’s worse?? Because the tension is so thick you could cut it with a knife.
And the worst part? Amber is genuinely sweet. She doesn’t deserve any of this. That’s what kills me.
The Characters — Let’s Talk About These Messy Humans
Andy — This guy is a mess. But like, a sympathetic mess. He’s not some alpha jerk. He’s actually kinda pathetic sometimes? In a real way. He keeps trying to do the right thing but his eyes keep drifting to Mia. You can see the guilt eating him alive. There’s a panel where he looks at Amber sleeping and then looks at the door where Mia just left. His face is just… broken. I felt bad for him even though I also wanted to shake him.
Mia — Okay, so Mia isn’t the “evil seductress” trope at all. She’s actually kinda lost. She asks Andy to “teach” her stuff (hence the title) but it’s never really about studying. It’s about wanting attention. Wanting to feel seen. She’s vulnerable and awkward and sometimes you’re like “girl no” but also… you get it.
Amber — Poor, sweet, clueless Amber. She’s just there trying to be a good fiancée. Making friends with the family. Laughing at dinner. And everyone knows something she doesn’t. Reading her scenes actually hurts because she’s so nice. Why did the writer do this to us??
Why Is Everyone Obsessed With This Comic?
Honestly? Because it’s not clean.
Most romance stories give you a hero and a villain. Good guy and bad guy. This one? Everyone is kinda right and kinda wrong at the same time. Andy’s torn. Mia’s lonely. Amber’s innocent. Nobody’s evil. That’s way more stressful to read than some bad guy you can just hate.
Also the art. I have to talk about the art. The way the artist draws silence? Insane. There’s this one panel where Andy and Mia are just standing in the barn, not talking, and you can feel the awkwardness. The sweat on his forehead. The way she’s picking at her sleeve. It’s uncomfortable and beautiful.
And the slow burn? My god. They drag it out just enough to make you crazy but not enough to make you quit. Every episode ends with you yelling at your phone.
My Honest Thoughts (No Filter)
Look, I went into Teach Me First expecting to roll my eyes. I’ve read so many “forbidden step-sibling” stories that were just… bad. Like, written-by-a-robot bad.
This one surprised me.
It’s actually painfully realistic. The way Andy lies to himself? “I’m just being a good brother.” “I don’t feel anything.” Meanwhile he’s literally counting the seconds until he sees Mia again. I’ve seen people do that in real life. Denial is real.
The scene that got me the most? When Andy is helping Mia with something (trying not to spoil) and Amber walks in smiling. And Andy panics. His face goes white. He stumbles over his words. And Amber doesn’t even notice anything’s wrong. She just gives him a kiss and goes back inside.
That hurt. Because you know he’s gonna hurt her eventually. It’s like watching someone walk toward a cliff.
That said, this comic isn’t for everyone. If you hate love triangles or anything with infidelity vibes, stay away. It’ll just stress you out. But if you like messy, psychological drama where nobody’s fully good or bad? You’ll love this.
Pros and Cons (Quick and Dirty)
Pros:
- The tension is unreal. Like, fan-yourself level.
- Characters feel like real people, not tropes.
- Art style carries the emotion when words can’t.
- Short enough to binge in one night (which you will).
Cons:
- Amber fans will suffer. I’m serious. It’s painful.
- The middle episodes drag a little. Episode 7-9 could’ve been tighter.
- No clear “good guy” to root for, which some people hate.
Final Verdict
Yeah, read it.
Teach Me First Comic isn’t for everyone. It’s messy and uncomfortable and sometimes you wanna throw your phone. But that’s also why it’s good. It made me feel stuff. Annoyance, sympathy, guilt, excitement — all at once.
I’d give it a solid 8/10. Loses points because my heart hurts for Amber and also because I wanted just a little more resolution at the end. But overall? Worth the late night.
So grab a snack, turn off your brain’s judgmental mode, and dive in. Just don’t blame me when you can’t sleep thinking about that barn scene.
FAQs
1. How long should my first comic be?
Your first comic should be between 4 and 8 pages. This length is manageable enough to finish in a short time frame but long enough to tell a complete story with a beginning, middle, and end. Avoid starting with a 22-page issue or a graphic novel until you’ve completed a few shorter projects.
2. Do I need to know how to draw realistically to make a comic?
No. Many successful comics rely on stylized, cartoony, or abstract art. The most important factor is clarity. As long as the reader can distinguish who is speaking and understand the action, your art style is valid. You can develop technical skills over time.
3. What is the best software for making digital comics?
Clip Studio Paint is the industry standard due to its powerful panel-cutting tools and asset library. Procreate for iPad is excellent for single-page illustrations but requires more manual work for multi-page books. If you are on a budget, Krita is a free, open-source alternative that handles comics well.
4. Should I write the script before drawing the art?
Yes. While some “pantser” artists draw spontaneously, writing a script first saves massive amounts of time. The script serves as a roadmap, preventing you from drawing yourself into a corner where the story doesn’t fit the page count or the dialogue has no room to breathe.
5. How do I protect my comic idea from being stolen?
Ideas are cheap; execution is valuable. Legally, your work is protected by copyright the moment it is fixed in a tangible medium (drawn or written down). However, worrying about theft is a common anxiety that stops beginners from sharing their work. The benefits of sharing your first comic for feedback and community far outweigh the minuscule risk of someone stealing an unpublished, untested idea.